How to use it in Figma, even if you have never used Figma
Four steps. You do not need to draw anything, and a free Figma account is enough.
Fill
Export
- Press Copy to FigmaClick the button on this page. The design is copied, like text you copy with Ctrl + C.
- Paste it in FigmaOpen Figma, open any file and press Ctrl + V (Cmd + V on Mac). You get real, editable layers.
- Make it yoursDouble-click a text to type your own words. Click a shape and change its color under Fill. Drag your own photo onto an image box.
- Export itClick the design. In the right panel, scroll to Export, choose PNG, JPG, SVG or PDF, then click Export.
Tip: install the free Google Fonts used in the design (the name shows when you click a text) so the text looks the same on your computer.
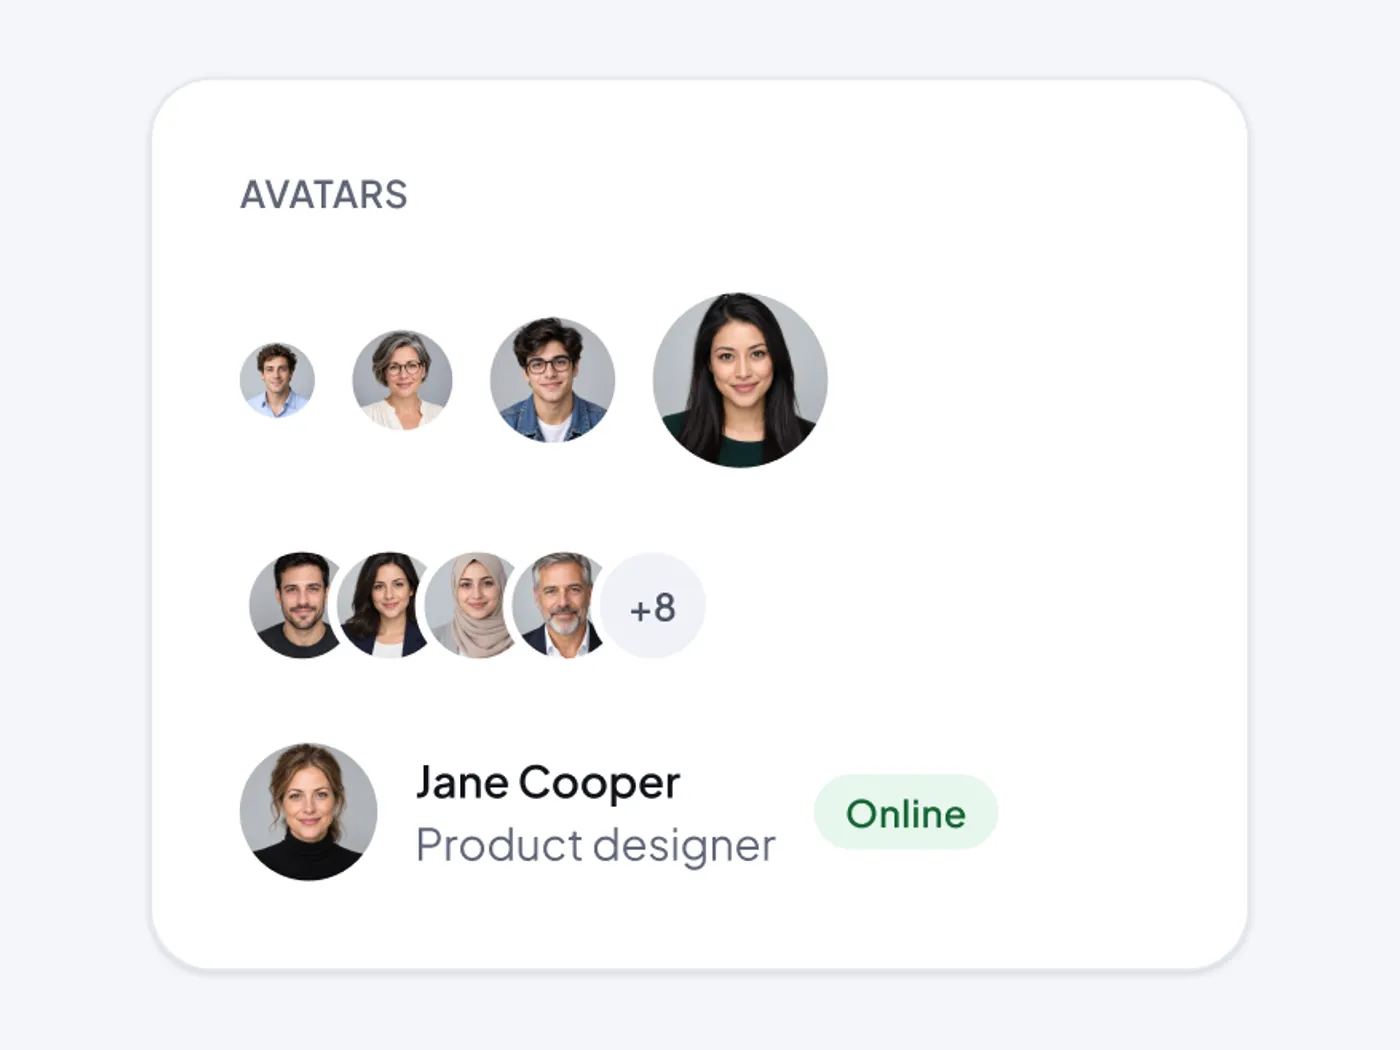
People make an interface feel real. This set has avatars in four sizes and a group that overlaps with a +8 counter.
What is included
- Four sizes: 24, 32, 40 and 56 pixels
- Overlapping group with a count
- User row with name, role and Online badge
- Image areas ready for your photos
- Light and dark versions
Where to use it
Use them in comments, teams and chat lists.
Design notes
The frame is 448 px wide and 382 px tall. Avatars come in four sizes: 24, 32, 40 and 56 px. The group overlaps by 12 px and shows a count. A user row shows the name, the role and an Online badge, and nine picture frames are ready for your photos.
Questions
How do I add my photos?
Select an avatar frame, choose Image under Fill and pick the photo. Square crops of faces work best.
How many avatars should a group show?
Show three or four, then a count such as +8. It keeps the row short.
How to use it
Copy this avatar and avatar group with the copy button and paste it into Figma with Ctrl+V or Cmd+V. The copy has a Light and a Dark frame, so use the one that fits your project. The text uses Plus Jakarta Sans, which is free on Google Fonts.